Inferno Guide- Creating Bookings and Feeds
Bookings
Creating a booking in Inferno allows you to schedule video transmission paths from source to destination with just a few clicks. Follow these steps to initiate a booking:
1. Navigate to the Bookings Page
From the Inferno home screen, click on the Bookings tab at the top of the interface, or select "View Bookings" from the Bookings tile.
2. Create a New Booking
To start a new booking:
- Click the red and white + (plus symbol) in the top-right corner of the screen.
- This will open the New Booking window.
3. Fill in Booking Details
In the New Booking window:
- Name: Enter a name for your booking. (Required)
- Start Time / End Time: Set the scheduled transmission start and end times.
- PO: (Optional) Enter a purchase order number for tracking.
4. Configure Your Feed
Under the Feeds section:
- Name: (Optional) Enter a custom name for the feed. If left blank, the system will auto-generate one based on your selected source and destination.
- Source: Select your video source from the dropdown.
- Destination: Select your destination from the dropdown.
- Check or uncheck Use Booking Start Time and Use Booking End Time as needed for timing control.
5. Add More Paths or Destinations
You have two options for expanding your booking:
- To add a new path entirely, click the red and white + button above the "Save Booking" area. This adds another source-to-destination feed.
- To send the same source to an additional destination, click the green Add Receiver button. This creates a multicast setup from a single source. Note: Any feed on the BitFire Transport Network can be sent to as many destinations as needed, without additional impact to the source internet bandwidth.
When finished, click Save Booking to confirm and schedule your transmission.
Note: To recreate and reschedule a booking exactly as constructed, simply click the Rebook option on the booking confirmation page, or navigate to the hamburger menu on the right part of your booking and select Rebook.
All bookings exist as drop-down elements, expanding when clicked on to show the feeds within. Every booking is made up of sources (where the signal is coming from) and destinations (where the signal is going to).
Creating a Booking
First, select the red plus button in the top right corner of the Feeds page. You will then be met with the “New Booking” window.
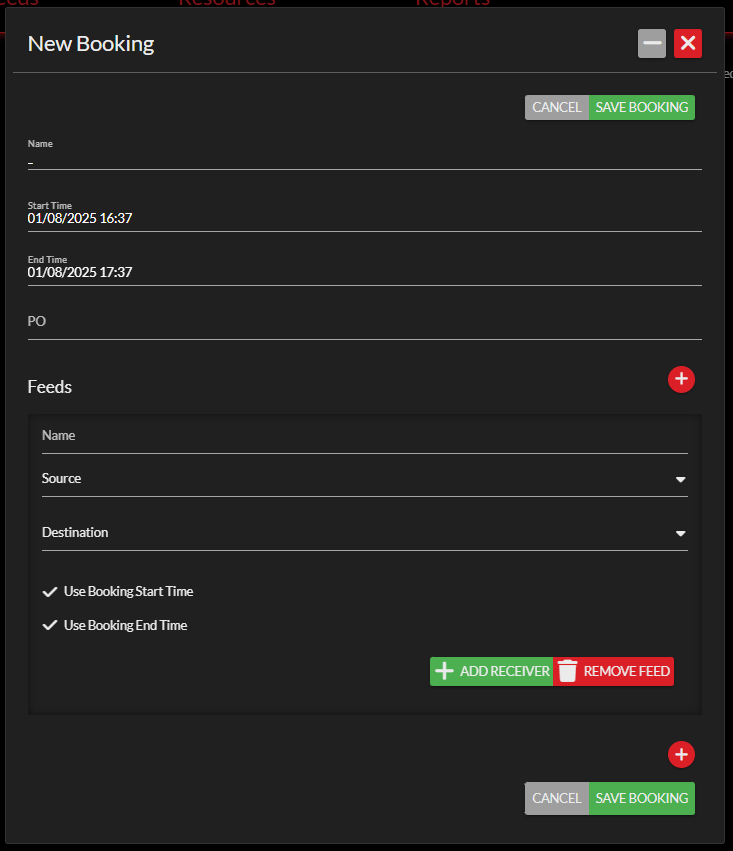
To create your booking, fill out these fields:
Name
- Set a display name for your booking. This field cannot be left blank.
Start/End Time
- Set the desired start/end time and date of your booking.
- By default, bookings will open at time of creation and stay open for 1 hour.
PO
- Purchase order (billable to someone else?)
Feeds
- Name
- Set a name for your individual feed.
- If no name is set, the default naming scheme creates a name of Source Endpoint Name to Destination Endpoint Name.
- Source
- The source endpoint of the feed.
- Destination
- The source destination of the feed.
- Use Booking Start/End Time
- Set a feed to start or end at times separate from the booking window.
- The times set using these parameters will be separate from the booking start/end time.
- Set a feed to start or end at times separate from the booking window.
- + Add Receiver
- Quickly create a new feed within your booking with the same source endpoint.
- Remove Feed
- Quickly delete a feed from your booking.
- Red +
- Creates a new feed.
- Save Booking
- Once you are done, press this button to save all changes and create the booking.
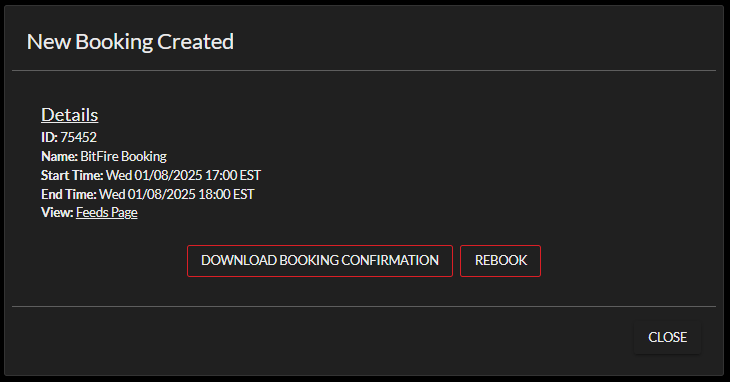
- New Booking Created
- After your booking has successfully been created, you will be met with a popup window. This provides you with your specific booking ID, booking name, start/end time, a link to view your booking, and two extra options.
- To download a .PDF file of your booking confirmation, select Download Booking Confirmation.
- To re-create this booking for a different time, select Rebook.